
Secure Your Kali Linux with UFW: Uncomplicated Firewall Setup#
Secure Your Kali Linux with UFW: Uncomplicated Firewall Setup#

- Introduction
In today’s world, securing your system and network from unauthorized
access is critical, and firewalls play an essential role in that
defense. UFW (Uncomplicated Firewall) is a user-friendly tool designed
to manage firewall rules easily, especially for those who are not
familiar with more complex firewalls like iptables{.markup–code
.markup–p-code}. While Kali Linux is a powerful platform used primarily
by penetration testers and security professionals, it’s equally
important to safeguard it with a proper firewall.
In this guide, I will take you step by step through configuring UFW on Kali Linux. Although UFW might seem technical at first, by the end of this tutorial, you’ll see that it’s actually a simple yet powerful tool you can use to improve your network security.
2. Installing UFW on Kali Linux#
Before diving into configuring UFW, we first need to ensure it is installed on your Kali Linux system, as it doesn’t come pre-installed.
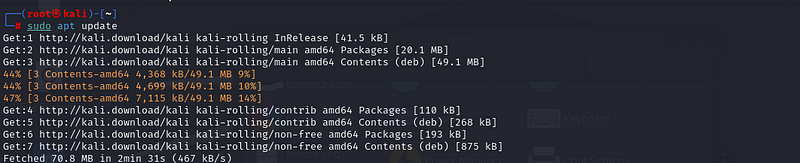
Step 1: Update Your System
Before installing UFW, it’s always a good practice to ensure your system
is up to date:
sudo apt update /sudo apt upgrade:
expected output
Step 2: Install UFW
To install UFW, run the following command in your terminal:
sudo apt install ufw:
expected output

Step 3: Verify UFW Installation
Once UFW is installed, you can check its version to ensure everything is
set up correctly:
sudo ufw version:
expected output

This will display the installed version of UFW and confirm that it’s ready to use.
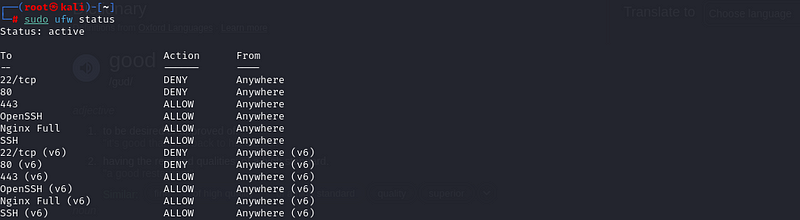
Step 4: Check UFW Status
After installation, UFW may not be enabled by default. You can check the
status with:
sudo ufw status:

This will likely show if the firewall is inactive or active
3. Basic UFW Configuration#
Now that UFW is installed, it’s time to configure it with some basic rules. UFW’s default settings can be restrictive, so we’ll walk through setting up essential rules to allow your system to function securely.
Step 1: Set Default Policies
UFW allows you to set default policies for incoming and outgoing
traffic. By default, it will allow outgoing connections and deny
incoming ones, which is a secure starting point.
To set these default rules:
sudo ufw default deny incoming:

Deny incoming: Blocks all inbound traffic unless specified by additional rules.
sudo ufw default allow outgoing:

- Allow outgoing: Permits all outbound traffic so your system can connect to external servers.
Step 2: Allow SSH Connections
If you are using SSH to remotely connect to your Kali Linux system, it’s
important to enable it, especially if you’ve just set UFW to block all
incoming traffic. To allow SSH (port 22):
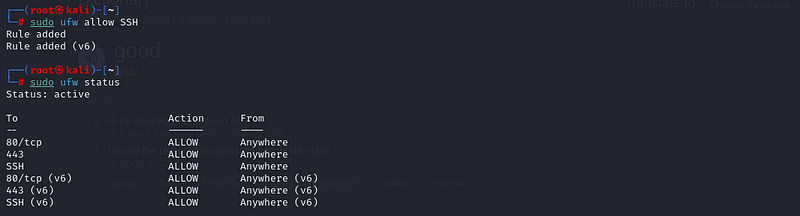
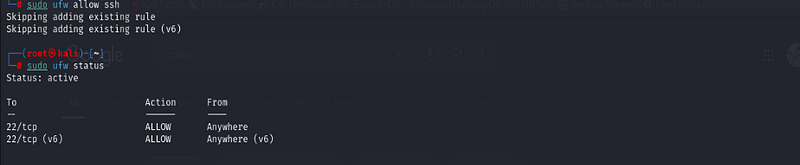
sudo ufw allow ssh:

you can see that SSH is allowed:
This ensures that even with a strict firewall, you can still remotely access the machine via SSH.
Step 3: Enable UFW
Now that the basic rules are set, it’s time to enable UFW:
sudo ufw enable:

You’ll be prompted with a confirmation message. Type `y` to proceed.
Once enabled, UFW will begin enforcing your firewall rules immediately. Be careful not to block yourself out of the system, especially if you’re connected remotely.
Step 4: Check UFW Status
To verify that UFW is enabled and to check what rules are currently
active, run:
sudo ufw status verbose
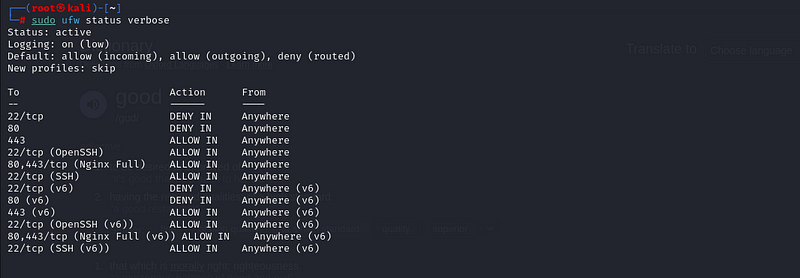
This will display the current status (`active` or `inactive`) and list all allowed/denied services.
4. Allowing and Denying Services in UFW#
With UFW enabled and basic rules in place, it’s important to fine-tune the firewall by allowing or denying specific services and ports based on your needs. Let’s go over some common configurations.
Step 1: Allow Common Services
UFW makes it easy to allow common services like HTTP, HTTPS, and SSH
with simple commands. Here’s how to allow traffic for these services:
- Allow HTTP (Port 80):
sudo ufw allow http


n/b(i had to reset my ufw to show case how i added port 80
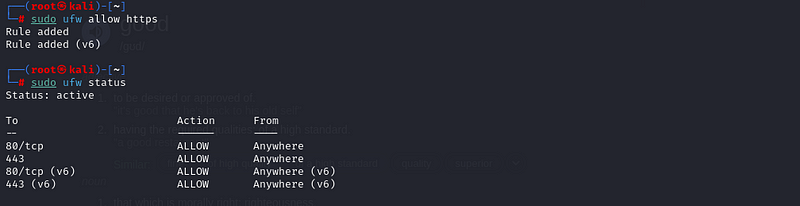
- Allow HTTPS (Port 443)
sudo ufw allow https
- Allow SSH (Port 22):
If you haven’t already allowed SSH in the previous step, you can do it here:
sudo ufw allow ssh
Step 2: Allow Custom Ports
For applications running on non-standard ports, you can specify custom
ports. For example, if you have a web server running on port 8080, you
can allow it as follows:
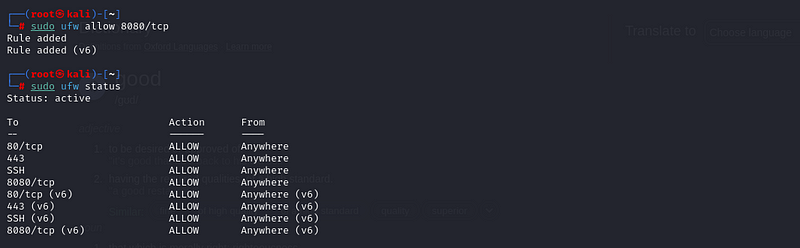
- Allow traffic on Port 8080:
sudo ufw allow 8080/tcp
Step 3: Denying Services
To block a specific service or port, you can use the `deny` option.
For example, to block SSH access:
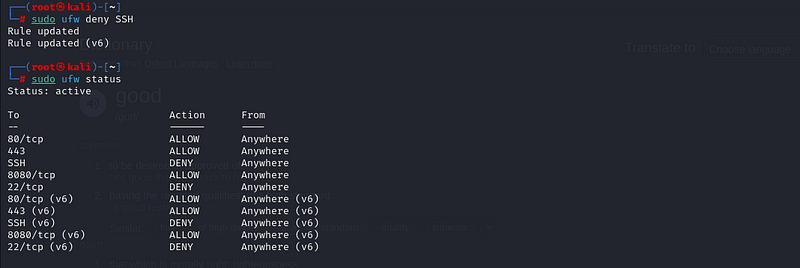
- Deny SSH:
sudo ufw deny SSH
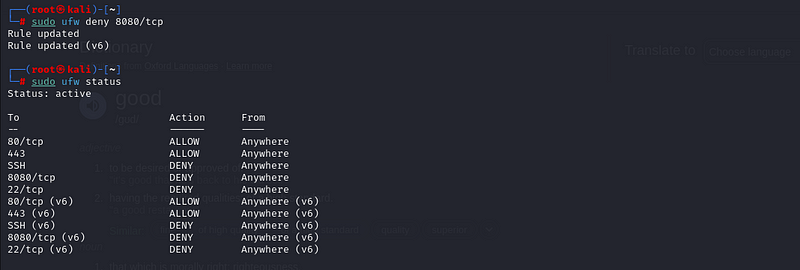
You can also block any custom port in a similar way. For instance, if
you want to block access to port 8080:
sudo ufw deny 8080/tcp
Step 4: Allowing Specific IP Addresses
Sometimes, you might want to allow a specific IP or range of IPs to
access a service while blocking others. For example, to allow SSH from a
specific IP address (ex`192.168.1.100`):
- Allow SSH from a Specific IP:
sudo ufw allow from 192.168.1.100 to any port 22
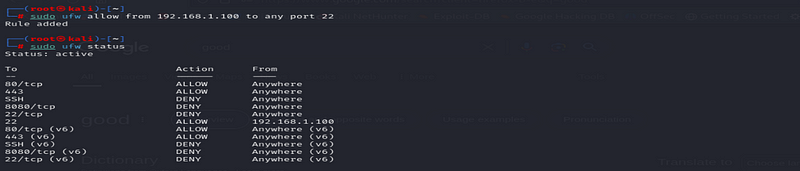
This ensures only connections from that IP address can access SSH.
Step 5: Viewing Active Rules
To see the current list of all active rules, run:
sudo ufw status numbered
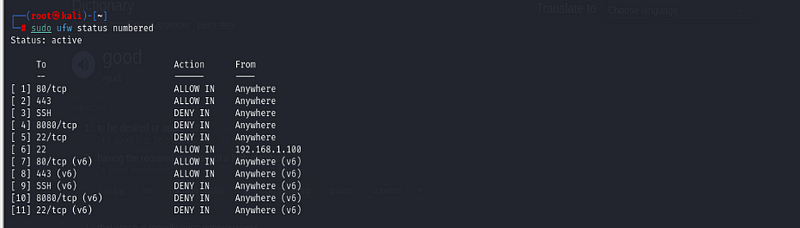
This will display all the rules along with their respective numbers, which will be useful when you want to delete a rule.
5. Managing and Deleting UFW Rules#
As you fine-tune your firewall settings, you might need to modify or remove certain rules. UFW provides simple ways to list, delete, and manage these rules.
Step 1: Listing UFW Rules
To view all the active rules, use the following command:
sudo ufw status numbered
This command will display each rule with a corresponding number, which is useful for managing or deleting specific rules later.
Step 2: Deleting UFW Rules
If you need to delete a specific rule, note the number from the list
displayed by `sudo ufw status numbered`. For example, if you want to
delete rule number 2, run:
sudo ufw delete 2

second image is when number 2 is deleted
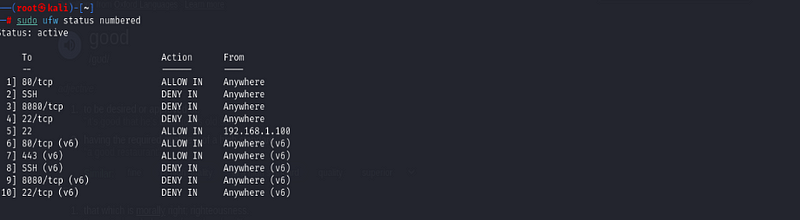
You’ll be asked to confirm the deletion. Once confirmed, the rule will be removed.
Step 3: Resetting UFW
If you want to reset UFW back to its default state and remove all custom
rules, use the following command:
sudo ufw reset
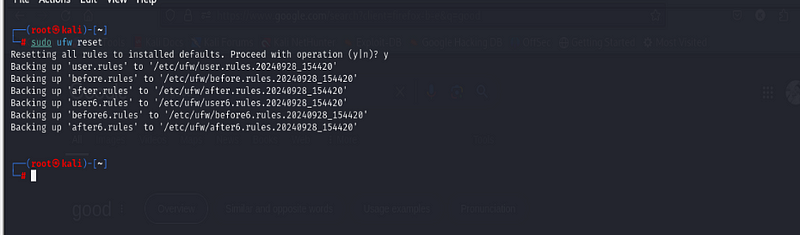
This command will disable UFW and delete all the existing rules, so use it with caution if you’ve already spent time configuring specific rules.
Step 4: Disabling UFW
If you need to temporarily turn off the firewall, you can disable UFW
without resetting it:
sudo ufw disable

This will stop enforcing the firewall rules until you enable it again.
Step 5: Re-Enabling UFW
To turn UFW back on after disabling it, use:
sudo ufw enable

Step 6: Modifying Rules
If you need to change a rule, the easiest way is to delete the existing
rule and create a new one. For example, to modify an SSH rule from
`allow` to `limit`, you would:\
- Delete the original rule:
sudo ufw allow ssh
2. Add the modified rule (rate-limited SSH):
sudo ufw limit ssh

6. Conclusion#
UFW (Uncomplicated Firewall) is a powerful yet simple tool that enables you to secure your Kali Linux system by managing incoming and outgoing network traffic. Through this guide, we’ve covered everything from installing UFW, setting default policies, and allowing or denying services, to managing and deleting rules. By applying these steps, you can effectively control access to your system, prevent unauthorized connections, and enhance your overall security.
UFW’s ease of use, combined with its ability to handle advanced configurations like custom ports and specific IPs, makes it an essential tool for anyone looking to strengthen their network defenses. Whether you are securing your home lab or a professional environment, UFW’s simple commands can provide robust protection without the complexity of other firewall solutions.
Now that you’ve mastered the basics of UFW, you’re equipped to customize your firewall setup further, automate security measures, and explore advanced features. Stay secure and continue exploring more ways to protect your systems!
END#
By Kiplagatkelvin{.p-author .h-card} on September 28, 2024.
Canonical link{.p-canonical}
Exported from Medium on February 13, 2025.