
Threat Hunting with OSINT and Splunk: A Hands-on Guide#

Introduction#
Cyber threats continue to evolve, and organizations must stay ahead of attackers by using proactive security measures. One key approach is threat hunting, which involves actively searching for threats within a network rather than waiting for alerts.
In this hands-on activity, we will use Open-Source Intelligence (OSINT) to gather threat data and then analyze security logs using Splunk to detect suspicious activity. This guide will walk you through the process using Kali Linux, demonstrating how to:
- Perform OSINT reconnaissance using Shodan.
- Use Splunk to ingest and analyze security logs.
- Identify suspicious activity based on OSINT findings.
- Propose mitigation strategies to strengthen cybersecurity defenses.
Let’s get started!
Variables Needed#
Before beginning, we must define key variables for our analysis:
- Target IP or Device Type — Identify a specific IP address, device type, or service to investigate.
- Threat Intelligence Indicators — Suspicious IPs, default credentials, exposed services, or vulnerable systems.
- Security Logs — Firewall logs, authentication logs, or network traffic logs to analyze.
- Splunk Queries — Search patterns to detect malicious activity.
Tools Used#
To complete this activity, we will use the following tools:
1. OSINT Tool: Shodan#
- Shodan ( https://www.shodan.io{.markup–anchor .markup–li-anchor data-href=“ https://www.shodan.io” rel=“noopener” target="_blank"}) is a search engine that scans and indexes Internet-connected devices.
- Helps identify exposed services, open ports, and vulnerabilities.
2. Security Information and Event Management (SIEM) Tool: Splunk#
- Splunk ( https://www.splunk.com) is a powerful SIEM that collects, analyzes, and visualizes security logs.
- We will use Splunk Free
3. Kali Linux
- Kali Linux includes essential tools for OSINT, penetration testing, and log analysis.
Step 1: Gather Threat Intelligence Using Shodan#
1.1 Access Shodan Online#
- Open Firefox or any browser.
- Navigate to Shodan.io{.markup–anchor .markup–li-anchor data-href=“ https://www.shodan.io” rel=“noopener” target="_blank"}.
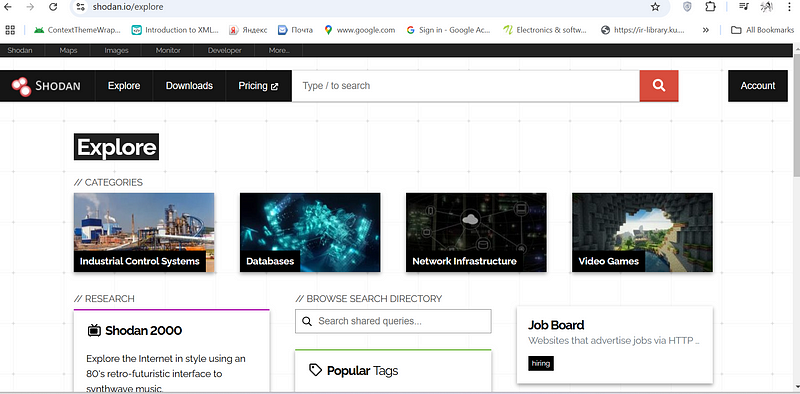
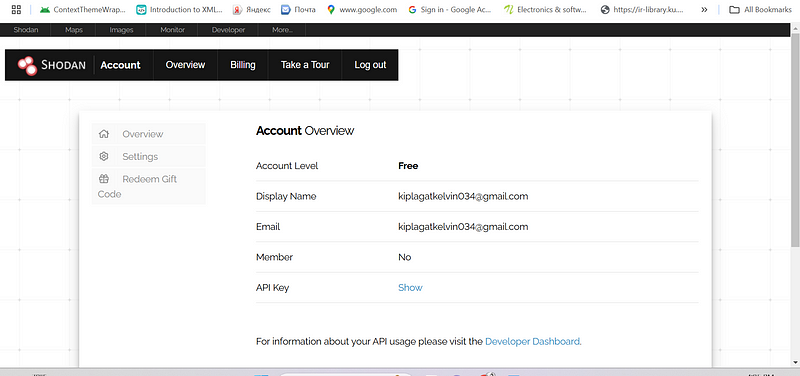
3. Create an account (if you haven’t already).
1.2 Perform an OSINT Search#
Use Shodan’s search bar to look for exposed and vulnerable systems:
Search for SSH services on port 22:#
port:22
it displays more open port : 22
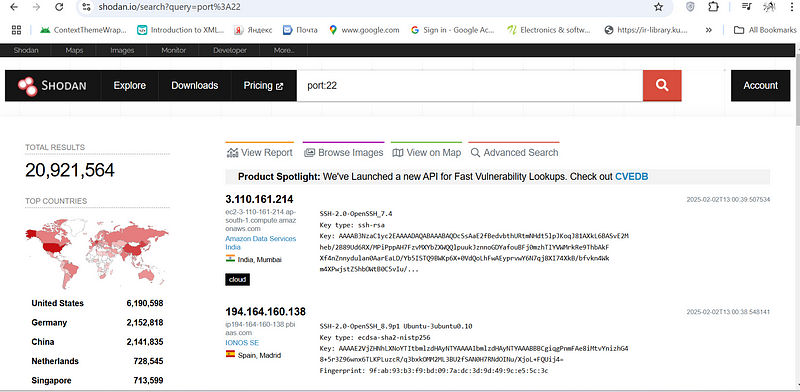
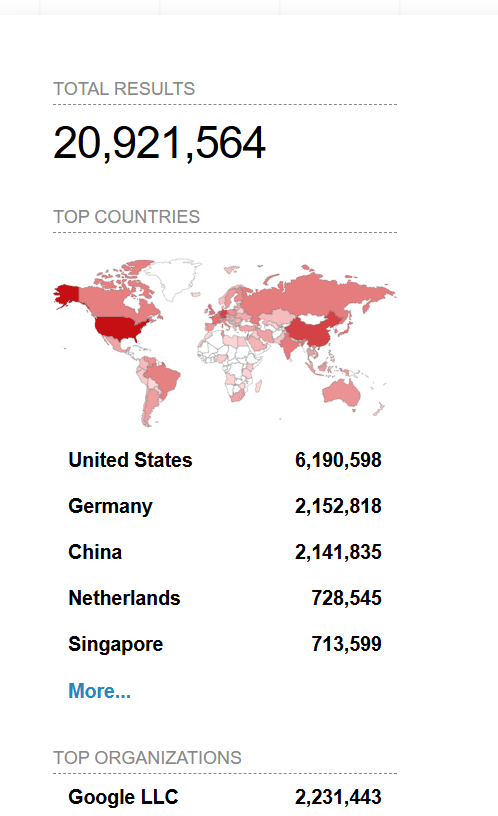
united states was leading in term of open port :22 with 20 million results then followed by Germany ,china and the list continue by…
i checked on the shodan report and vulnerability section is where i was paying attention to:
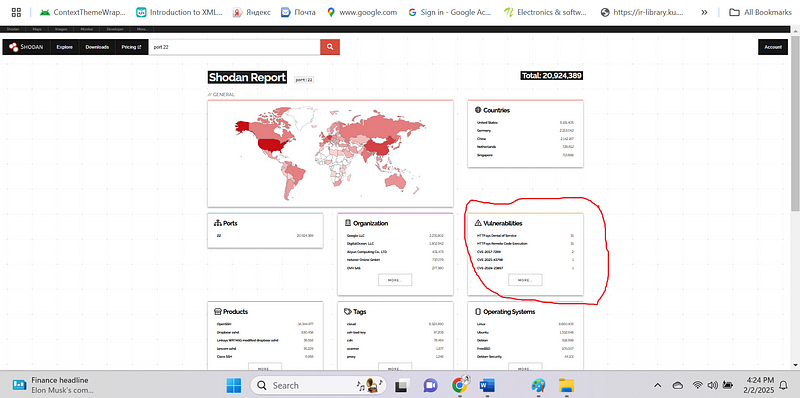
SSH Services on Port 22 (port:22):#
- Type of Exposed Devices: A wide variety of devices expose SSH (Secure Shell) services on port 22. This could include servers (web servers, database servers, file servers), routers, firewalls, network devices, and even embedded systems. The prevalence of SSH on port 22 is because it’s the standard port for remote administration.
- Potential Risks: Exposing SSH directly to the internet carries significant risks:
- Brute-Force Attacks: Attackers can attempt to guess usernames and passwords to gain access.
- Vulnerability Exploitation: If the SSH server software has known vulnerabilities, attackers can exploit them to gain control.
- Man-in-the-Middle Attacks: If SSH is misconfigured or weak ciphers are used, attackers might intercept communication and steal credentials or manipulate data.
How Attackers Could Exploit These Systems:
Gaining Initial Access: Once an attacker gains access via SSH, they can pivot to other systems on the network.
Data Breaches: Attackers can steal sensitive data stored on the compromised server.
Malware Installation: Attackers can install malware, such as ransomware or backdoors, to maintain persistence or disrupt operations.
Denial-of-Service (DoS) Attacks: Compromised systems can be used as part of a botnet for DDoS attacks.
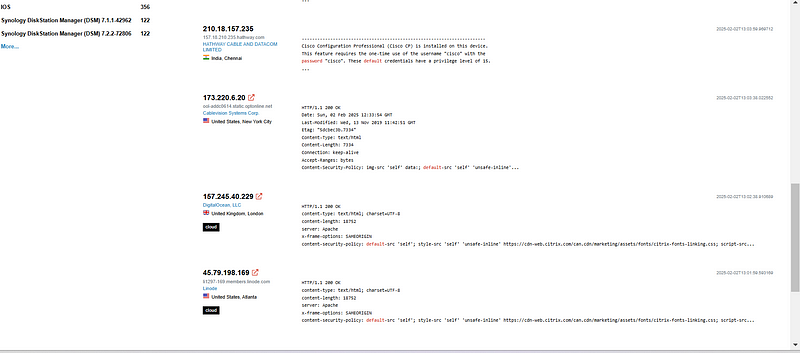
- Find devices with default passwords:
i was curious to check devices with default password.
default password
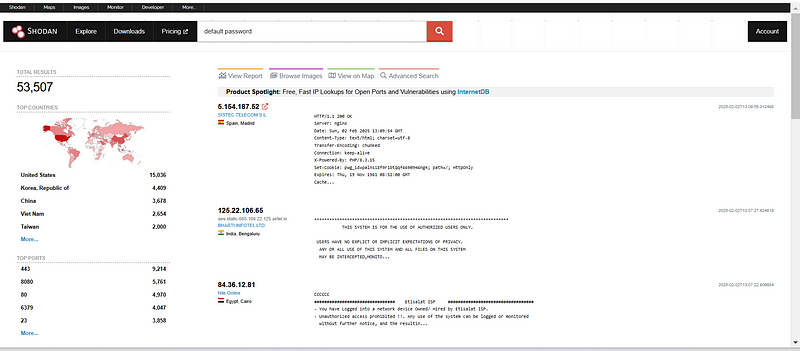
shodan report states that the vulnerabilties were 17
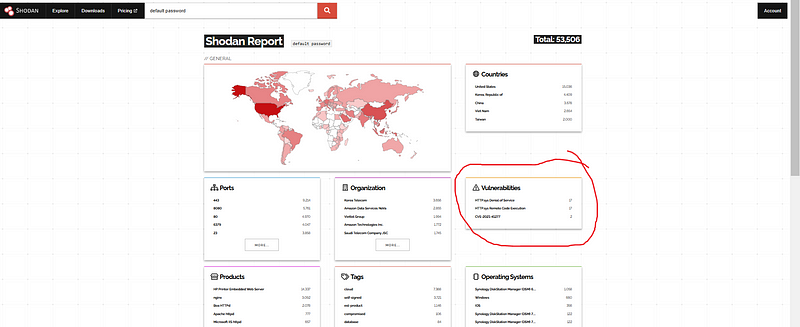
Devices with Default Passwords (default password):#
Type of Exposed Devices: Devices using default passwords are often IoT devices (routers, cameras, smart home devices), embedded systems, and older network equipment. These devices are often overlooked in terms of security updates and configuration.
Potential Risks: Using default passwords is extremely risky. Attackers can easily find default credentials online or use automated tools to scan for devices with these weaknesses.
How Attackers Could Exploit These Systems:#
Easy Access: Default credentials provide trivial access to the device, bypassing any other security measures.
Device Hijacking: Attackers can take control of the device for malicious purposes, like including it in a botnet.
Data Theft: If the device stores or processes data, attackers can access it.
Network Compromise: A compromised device on the network can be a stepping stone to other, more critical systems.
Identify vulnerable Apache servers:#
product:apache httpd
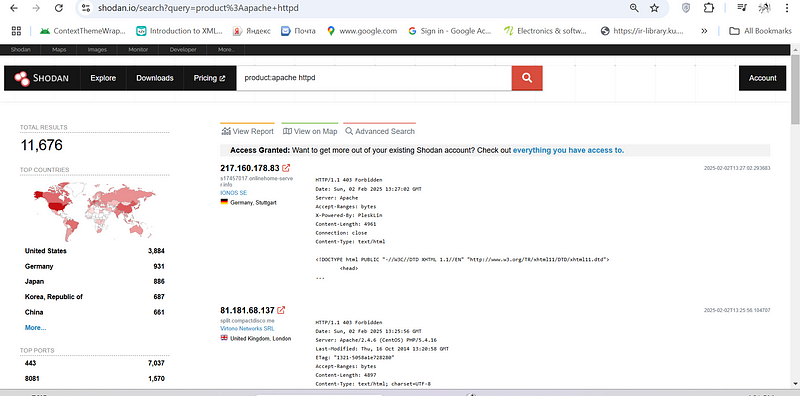
shodan report vulnerabity section:
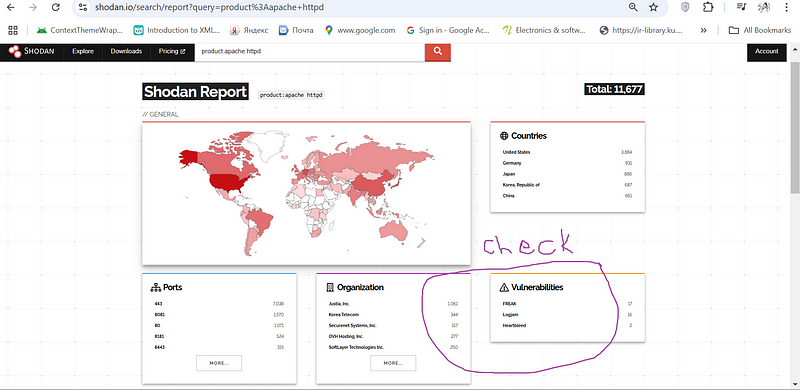
Vulnerable Apache Servers (product:apache httpd):#
Type of Exposed Devices: Web servers running the Apache HTTPD software.
Potential Risks: Apache, like any software, can have vulnerabilities. These vulnerabilities can range from information disclosure to remote code execution.
How Attackers Could Exploit These Systems:#
Remote Code Execution (RCE): The most severe vulnerabilities allow attackers to execute arbitrary code on the server, potentially giving them complete control.
Local File Inclusion (LFI): Attackers might be able to read sensitive files on the server.
- Cross-Site Scripting (XSS): Attackers can inject malicious scripts into web pages served by the vulnerable Apache server, potentially targeting users.
- Denial-of-Service (DoS): Exploits might cause the server to crash or become unavailable.
Step 2: Collect and Analyze Data Using Splunk#
2.1 Install or Access Splunk#
Option 1: Install Splunk Free on Kali Linux#
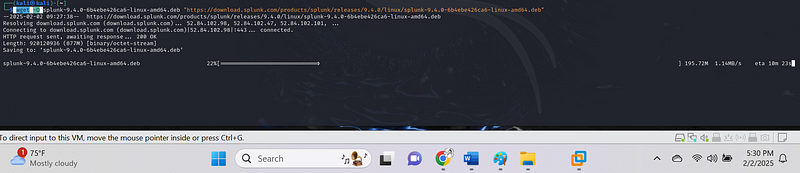
- Download Splunk from Splunk Download{.markup–anchor .markup–li-anchor data-href=“ https://www.splunk.com/en_us/download/splunk-enterprise.html" rel=“noopener” target="_blank”}.
Breakdown of the Command:#
wget -O splunk.deb "https://download.splunk.com/products/splunk/releases/latest/linux/splunk-latest-linux-2.6-amd64.deb"

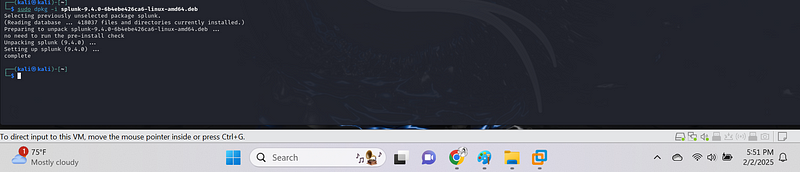
2. Install it using:
dpkg -i splunk-splunk-9.4.0-6b4ebe426ca6-linux-amd64.deb
3. Start Splunk and set an admin password:
sudo /opt/splunk/bin/splunk start -accept-license

4. Open Splunk’s web interface:
http://127.0.0.1:8000
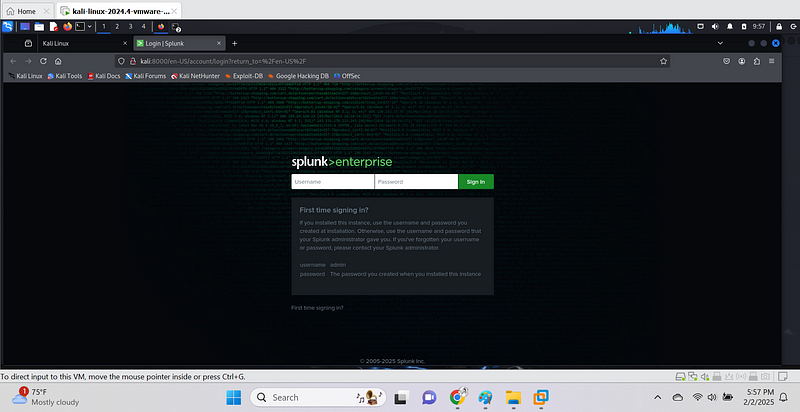
already logged in:

2.2 Ingest Security Logs into Splunk#
- Collect logs from firewall, authentication, or network traffic:
sudo tail -f /var/log/auth.log sudo cat /var/log/syslog && sudo tcpdump -i eth0 -w capture.pcap
it us began capturing the file and we are creating a traffic
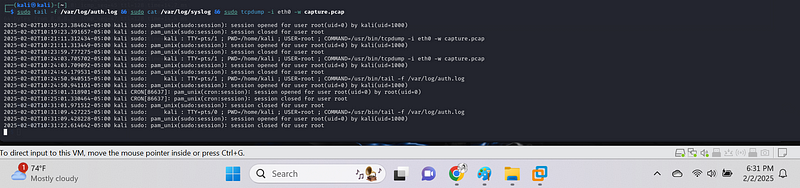
Monitor /var/log/auth.log{.markup–code .markup–h4-code} with tail -f#
sudo tail -f /var/log/auth.log

This will continuously display the last few lines of
/var/log/auth.log{.markup–code .markup–p-code} and update the output
as new entries are added.
Collect logs from a network or endpoints#
Ingest Security Logs:
sudo tail -f /var/log/auth.log   # View authentication logs
sudo cat /var/log/syslog         # View system logs
sudo tcpdump -i eth0 -w capture.pcap   # Capture network traffic
- Upload logs into Splunk.
to ingest data to splunk the data we had earlier on generated we go setting and then data input then Choose the Data Type:
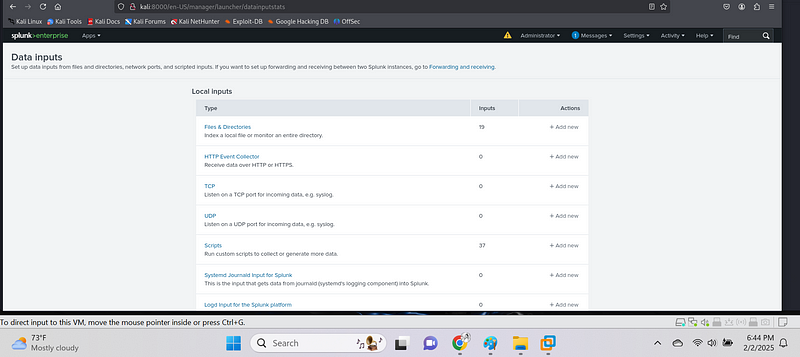
- Select the type of input you want to configure. For example, if you’re uploading a log file from your local machine, choose Files & Directories.
- If you’re collecting logs directly from a network or a server, you can choose other inputs like TCP/UDP or HTTP Event Collector.
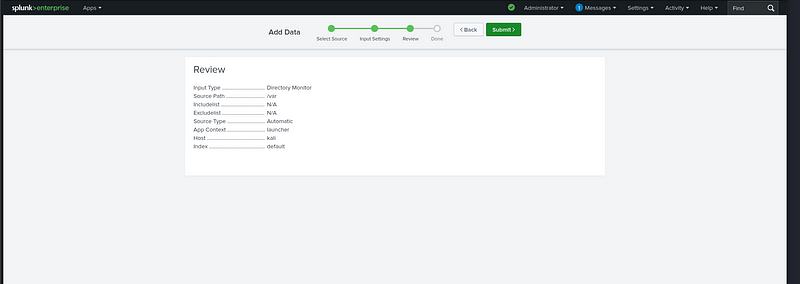
below image display adding data.
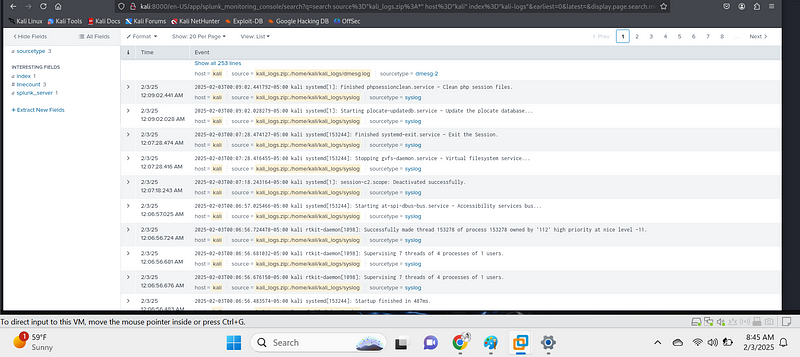
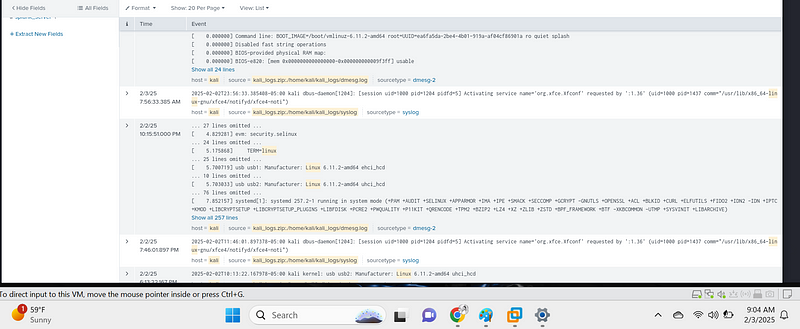
2.3 Hunt for Suspicious Activity#
Use Splunk to analyze security logs and detect threats:
- Go to Search & Reporting.
- Run a search query to verify the logs are ingested
- Find failed SSH login attempts:
index=auth | search "Failed password"
. Look for privilege escalation attempts:
index=linux_logs | search "sudo su" OR "sudo -i"
Step 3: Mitigation and Remediation#
3.1 Mitigation Steps#
- Block malicious IPs using iptables:
sudo iptables -A INPUT -s <malicious_ip> -j DROP
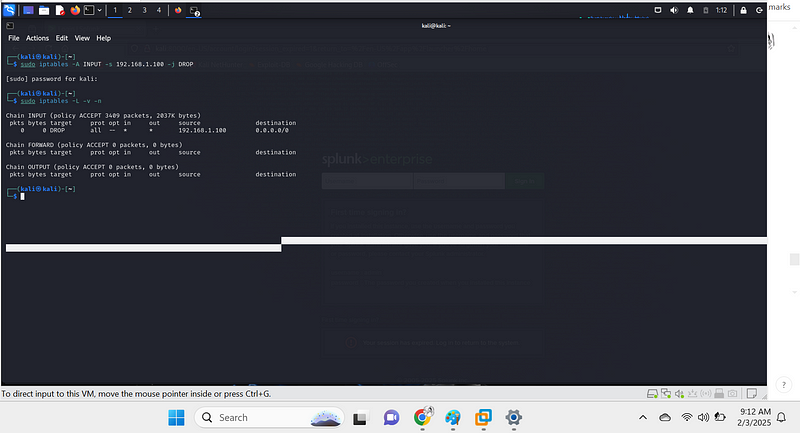
Your iptables rule has been successfully added! 🎉
The output confirms that traffic from
192.168.1.100{.markup–code .markup–p-code} is now being
dropped because:
✅ The rule appears in the INPUT chain
✅ Packets (pkts) and bytes (bytes) count is 0 — This means the
blocked IP hasn’t tried to connect yet
2. Update security patches
sudo apt update && sudo apt upgrade -y
obviously update the patch daily if you can

3. Harden SSH security:
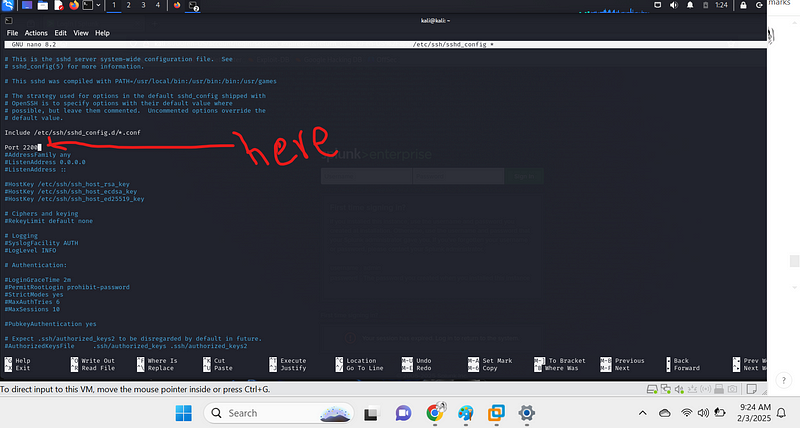
sudo nano /etc/ssh/sshd_config
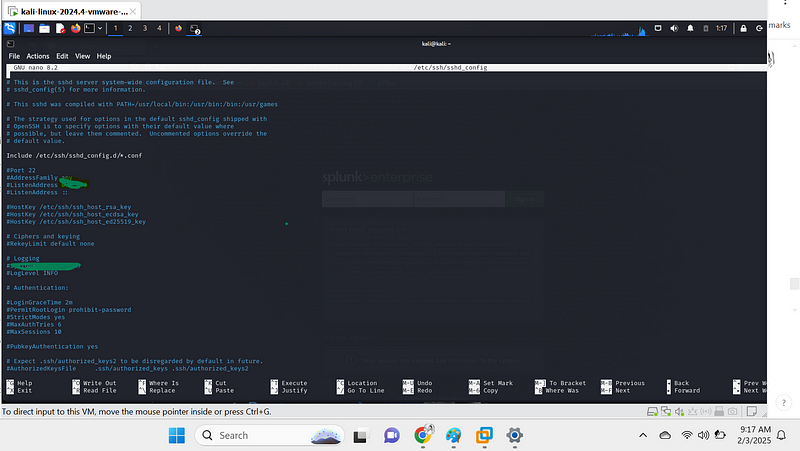
4. Change Port 22 → Custom Port
Always pick a port above 1024 (e.g., 2200{.markup–code
.markup–p-code}, 2222{.markup–code .markup–p-code},
2525{.markup–code .markup–p-code}) to avoid conflicts with system
services.
- Locate this line:
#Port 22
- Remove the
#{.markup–code .markup–li-code} and change22{.markup–code .markup–li-code} to a custom port (e.g.,2200{.markup–code .markup–li-code} or any unused port above1024{.markup–code .markup–li-code}).
plaintext Port 2200
Conclusion#
This hands-on activity demonstrates the importance of combining OSINT and SIEM tools to detect cyber threats. By using Shodan for reconnaissance and Splunk for log analysis, we can identify potential security risks and implement measures to mitigate them.
Would you like to see more in-depth Splunk queries or additional OSINT tools? Let me know in the comments! 🚀
By Kiplagatkelvin{.p-author .h-card} on February 3, 2025.
Canonical link{.p-canonical}
Exported from Medium on February 13, 2025.